Since Ethereum grew in adoption, standards had to be created to create solid, cross-platform software apps. Ethereum Improvements Proposals (EIPs) are usually the way people discuss new standards for the blockchain development ecosystem. One such proposal is a standard for fungible tokens: ERC-20. Introduced in 2015, ERC-20 (also referred to as EIP-20) is the first and most popular token standard in Ethereum.
The ERC-20 token standard allows developers to create fungible tokens (i.e., that can be exchanged for one another) with smart contracts. This standard has become a popular way to create tokens on the Ethereum blockchain, leading to the creation of a wide variety of digital assets for different purposes.
What Is The ERC-20 Token Standard?
ERC-20 defines a set of API methods and events to ensure that all tokens created using this standard are compatible with other Ethereum tokens. The API methods are:
totalSupply(): Returns the total number of tokens in circulation;balanceOf(address _owner): Returns the token balance of a specific address;transfer(address _to, uint256 _value): Transfers a specified number of tokens from the sender's account to the specified recipient;transferFrom(address _from, address _to, uint256 _value): Allows a third party to transfer tokens from one account to another;approve(address _spender, uint256 _value): Enables a token owner to permit a third party to spend tokens on their behalf;allowance(address _owner, address _spender): Returns the number of tokens that an account is allowed to spend on behalf of a token owner.
The events defined in the ERC-20 standard include:
Transfer: Triggered when tokens are transferred between accounts;Approval: Triggered when a token owner approves another account to spend tokens on their behalf.
Besides all those methods and events, ERC-20 tokens also have these three important fields:
name: The name of the token (e.g Binance USD);symbol: The ticker that represents the currency (e.g BUSD);decimals: The number of decimals supported when displaying balances to humans.
Required Tools For Building Your Own Token
Building a brand new ERC-20 token doesn’t really require a huge setup, you can do everything from your own browser using Remix, for example. Remix is a complete IDE for Solidity development that runs on the browser and can handle nearly all simple projects. Although Remix is not recommended for more complex projects, you can use its tools for interacting with your smart contracts and building POCs without spending much time setting up a development environment.
For more complex and bigger projects, using a framework like Hardhat (for JS/TS developers) or Brownie (for Python devs) is probably the best path to follow. In this tutorial, we will cover the ERC-20 token creation process using Hardhat, so feel free to dive into its documentation to learn more about what it has to offer.
How To Create An ERC-20 Token
Now let’s get our hands on the code and build our brand new ERC-20 token. If you never created a smart contract before with Solidity, we recommend you to read this article, it’s a good introduction to this topic.

Step 0 - Installing Global Dependencies (optional)
In order to use Hardhat, you need to have NodeJS (and NPM) installed on your machine. If you don’t have it yet, install them from this source. NPM is installed together with NodeJS and should be available from your terminal after installation.
Step 1 - Setting Up the Development Environment
First of all, create a new folder where the project will be located. Once you have created the folder, run the following command inside it:
npx hardhat
If everything is fine, you should see something like this:
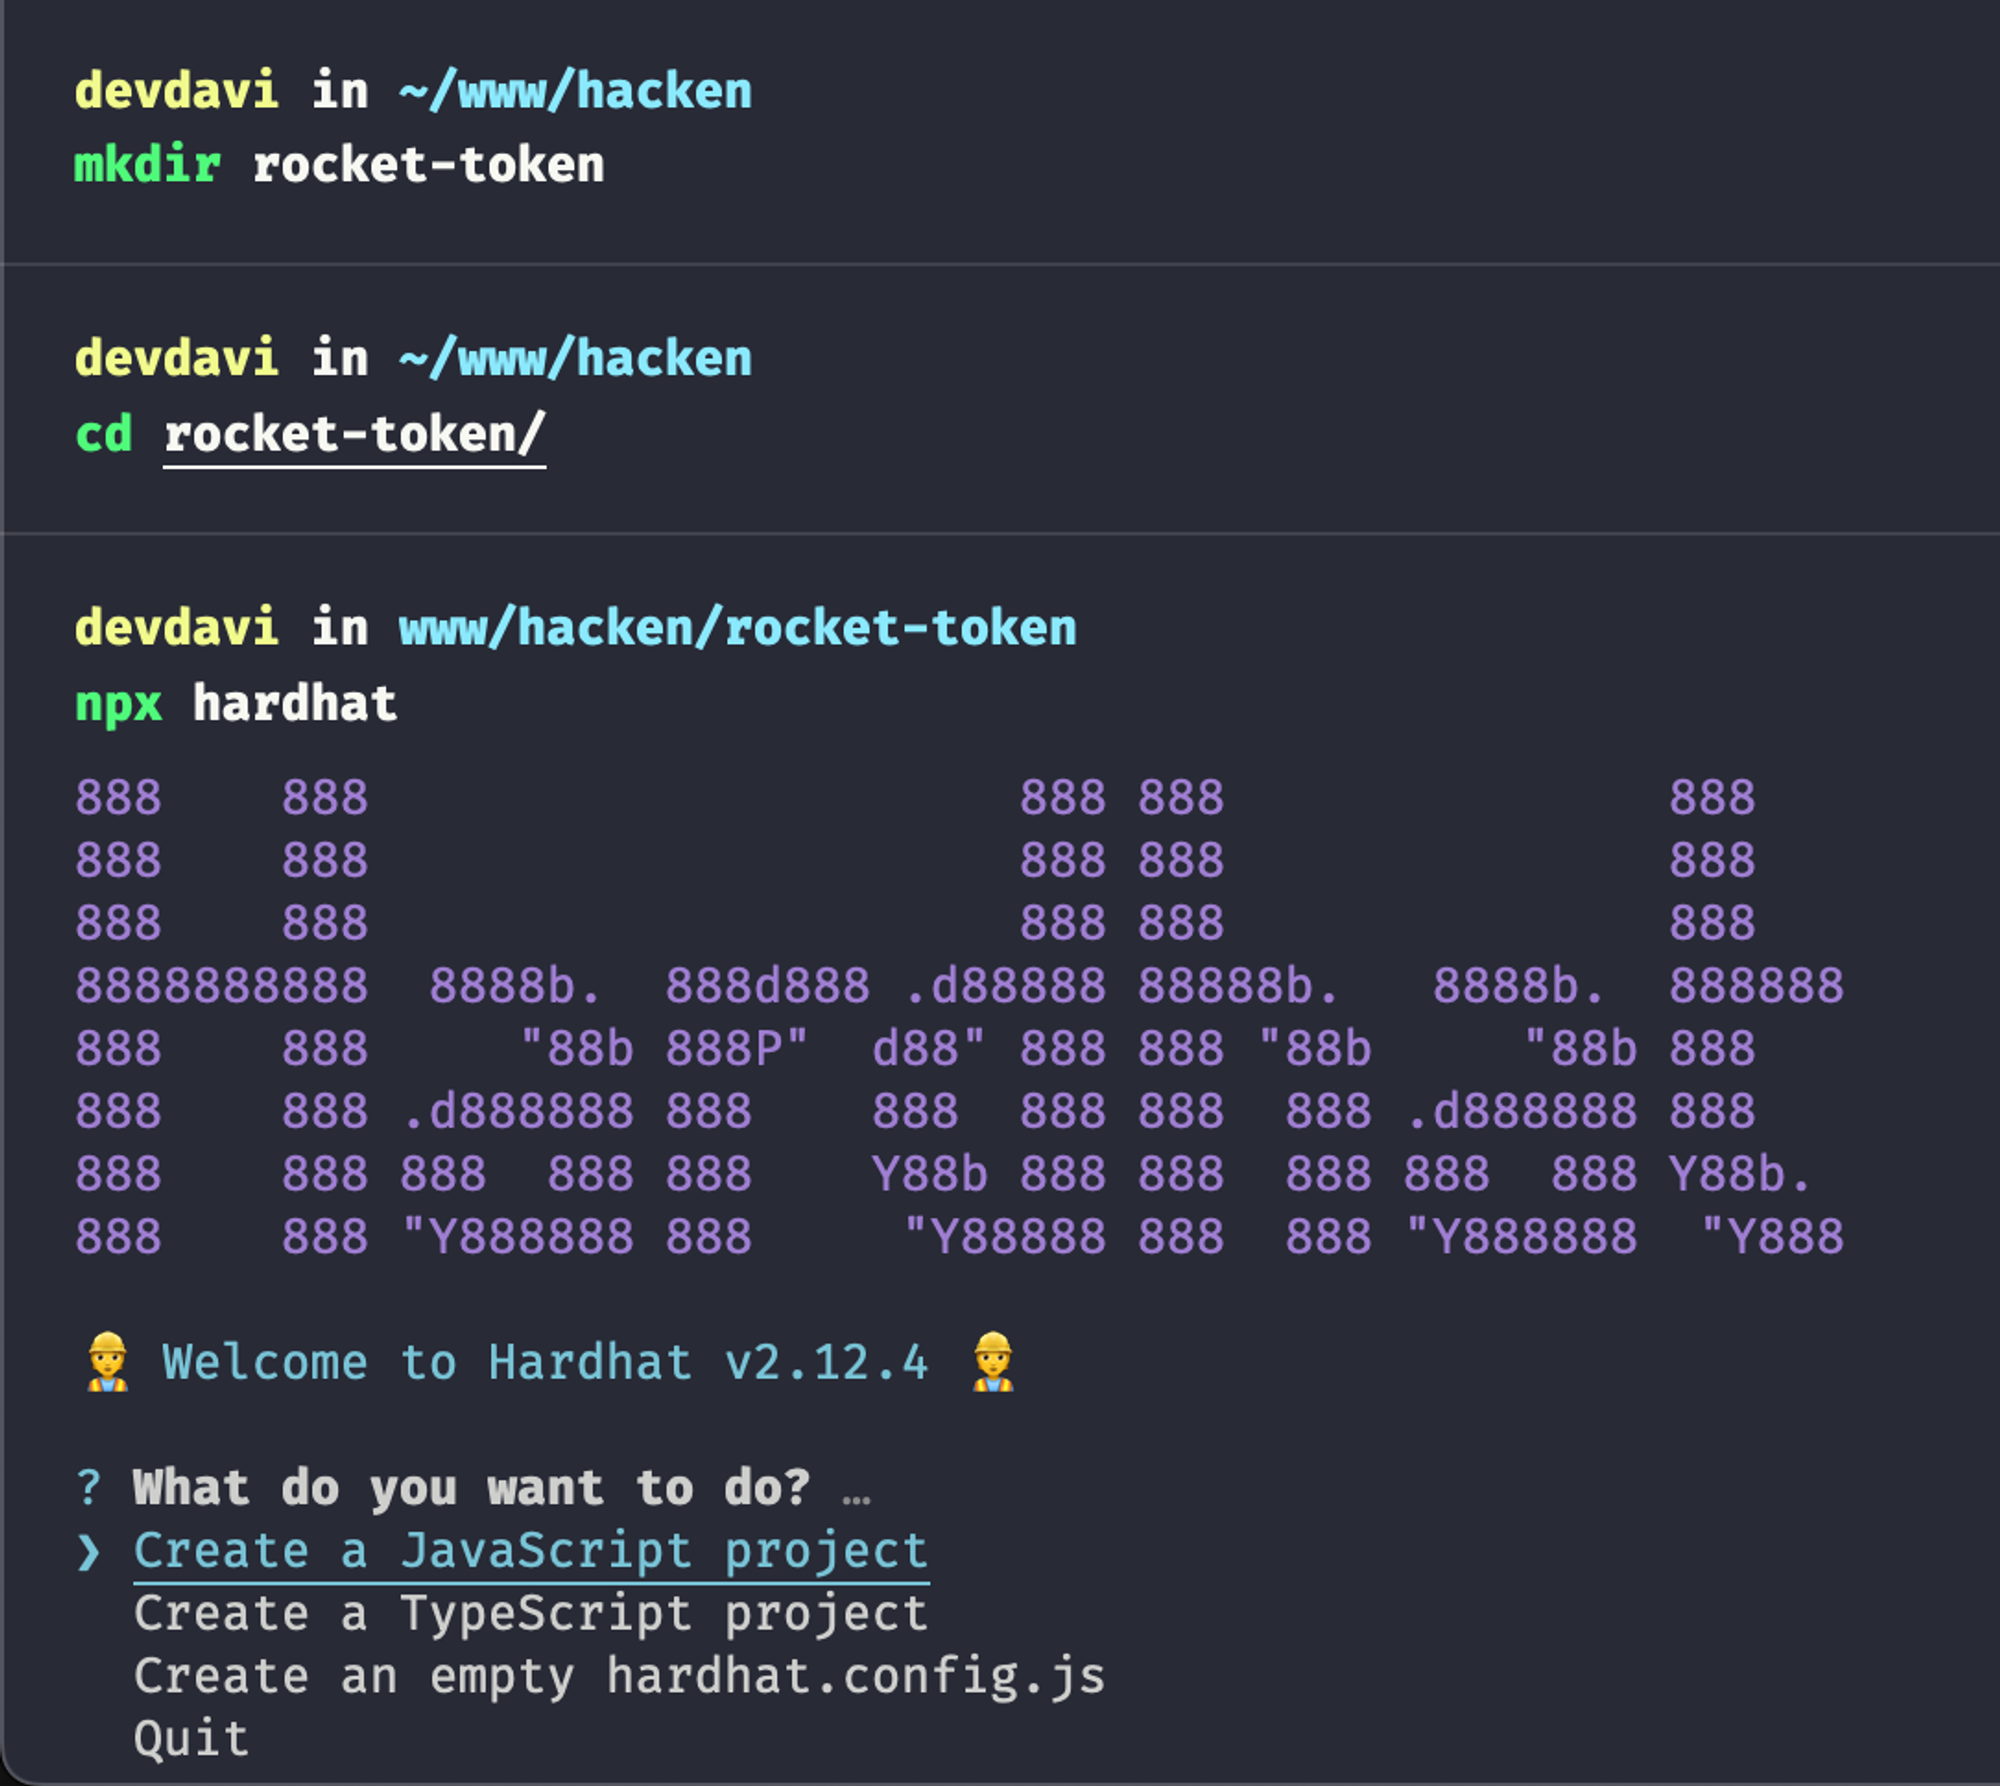
If you are proficient in TypeScript, don’t hesitate to create the project using TS, but for this article, we will select the JavaScript option by pressing enter/return. For the next questions, we will just press enter to use the default options. Once all questions were answered, NPM (Node Package Manager) will do the hard work installing all project dependencies and, yes, that can take some time, but don’t worry!
Step 2 - Knowing the Project Structure
After the setup process is done, you can open the project folder with an IDE (or modern text editors), and you will see this folder structure:
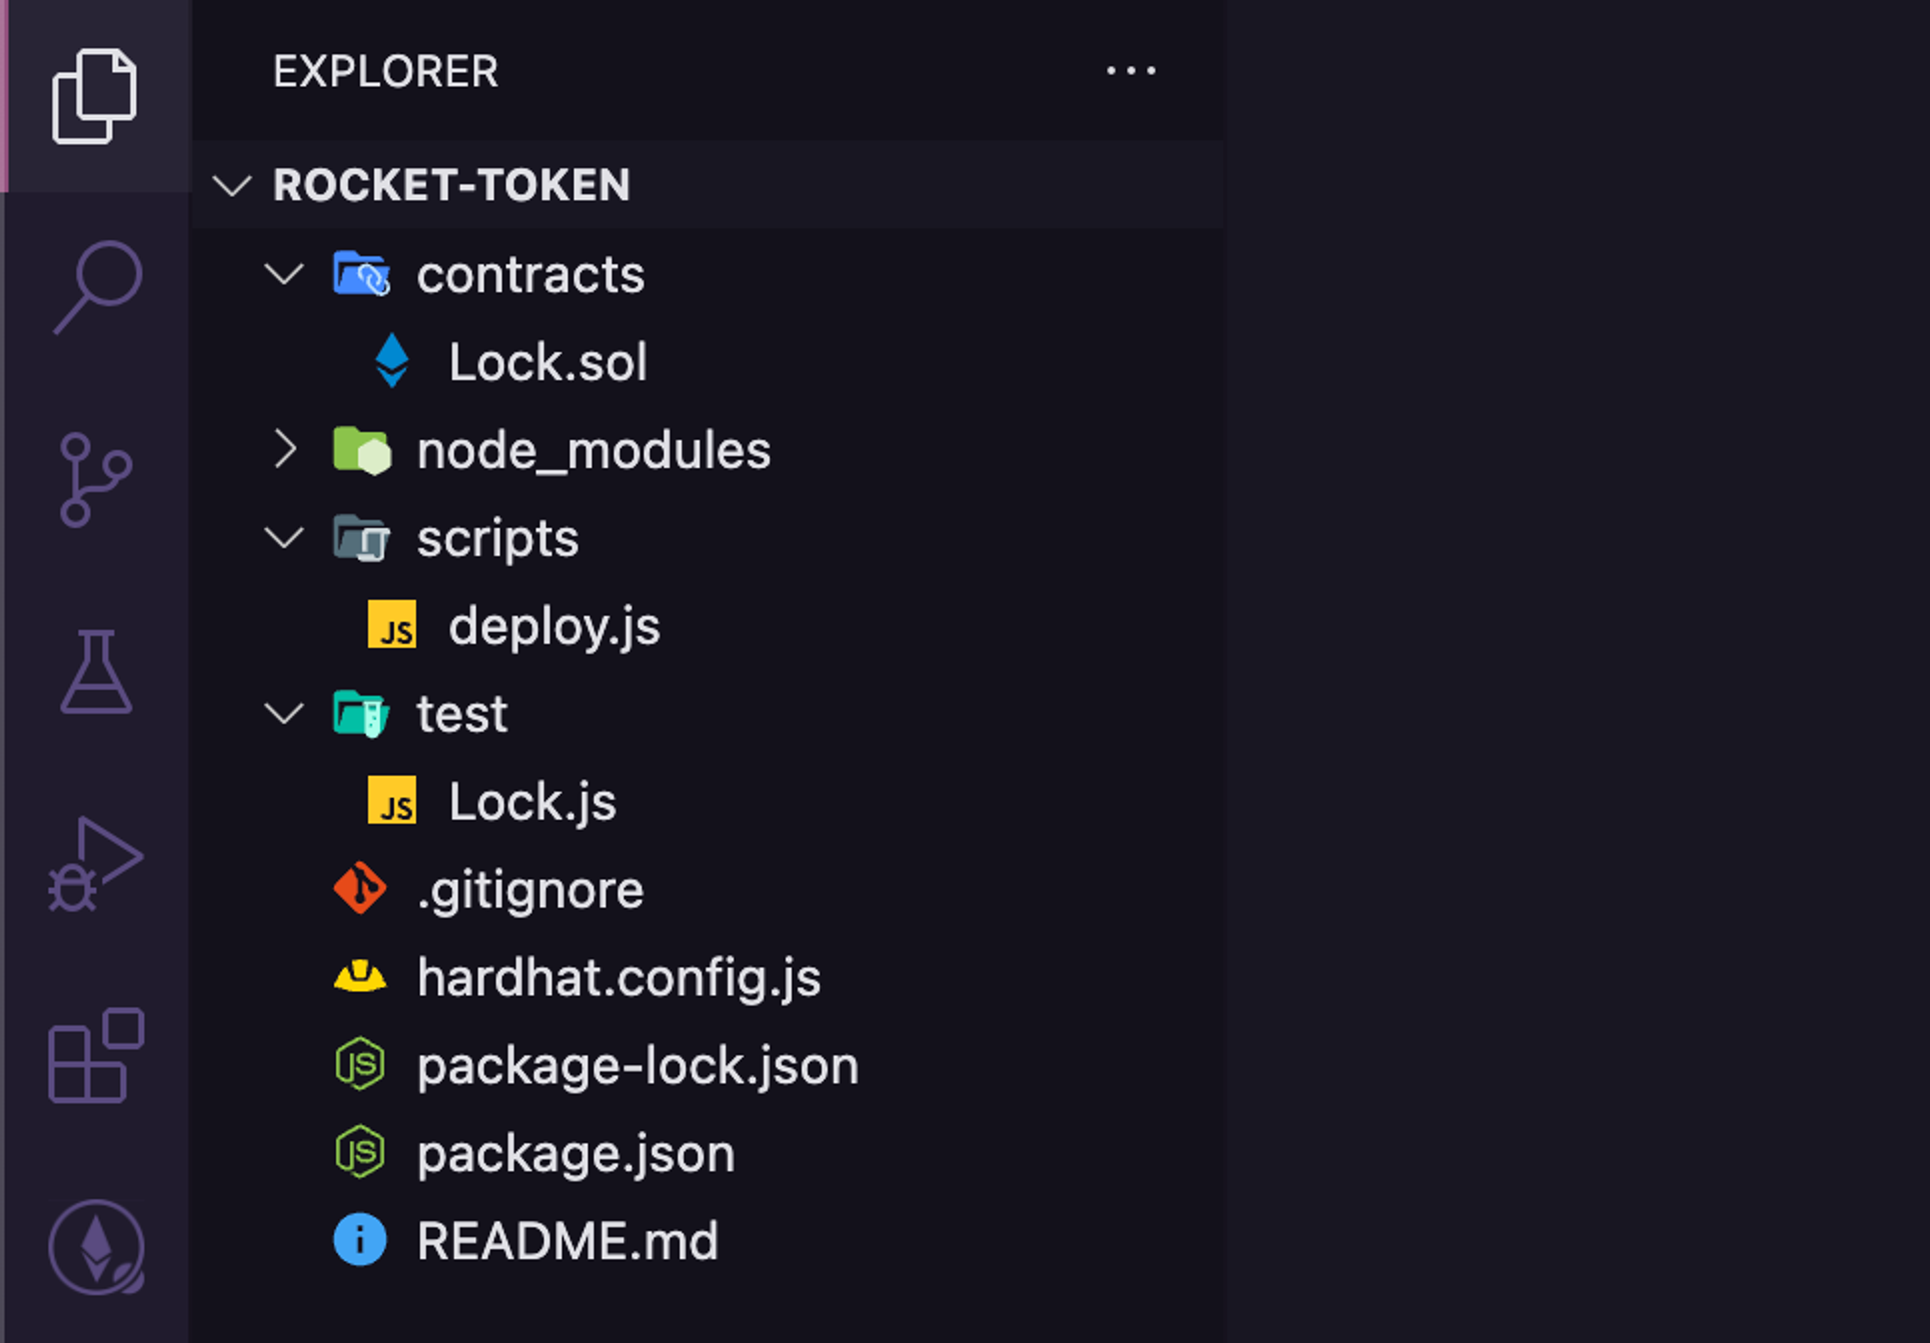
This is how Hardhat organizes new projects by default:
contracts: The folder containing all relevant source code (Solidity smart contracts);scripts: Where useful scripts for interacting with the blockchain are located;test: An important folder that will keep all automated tests for you to test your contracts and improve their security;hardhat.config.js: All Hardhat settings are placed inside this file;package.json: The file that stores general info about your project such as name, version, and dependencies;package-lock.json: Used for storing info about your installed dependencies versioning. This file is generated automatically, and you should never edit this file manually.
And, of course, there’s another folder: node_modules. That folder is handled automatically by the package manager and contains all external dependencies. You should never modify its content manually.
Now, if that’s your first time using Hardhat, take some time to look into each of these folders and files to feel more comfortable with this structure.
Step 3 - Installing External Dependencies
As we talked before, standards like ERC-20 are discussed and improved by the community. One of the biggest organizations in this world is OpenZeppelin, a huge player that is responsible for developing some of these well-known standards. We will use their contracts to help us to develop our ERC-20 token.
For installing OpenZeppelin’s contracts, we will use this command:
npm install @openzeppelin/contracts --save-dev
We will use NPM because Hardhat comes with NPM by default and moving to Yarn requires more configurations. The --save-dev flag tells NPM that these dependencies should be used just for development and that these files should not be included in future JavaScript builds.
Step 4 - Creating the Smart Contract
After installing OpenZeppelin’s contracts, we will clean our folders, removing contents from contracts, scripts and tests. Once the project structure is clean, we will create a new file Token.sol. inside the contracts folder.
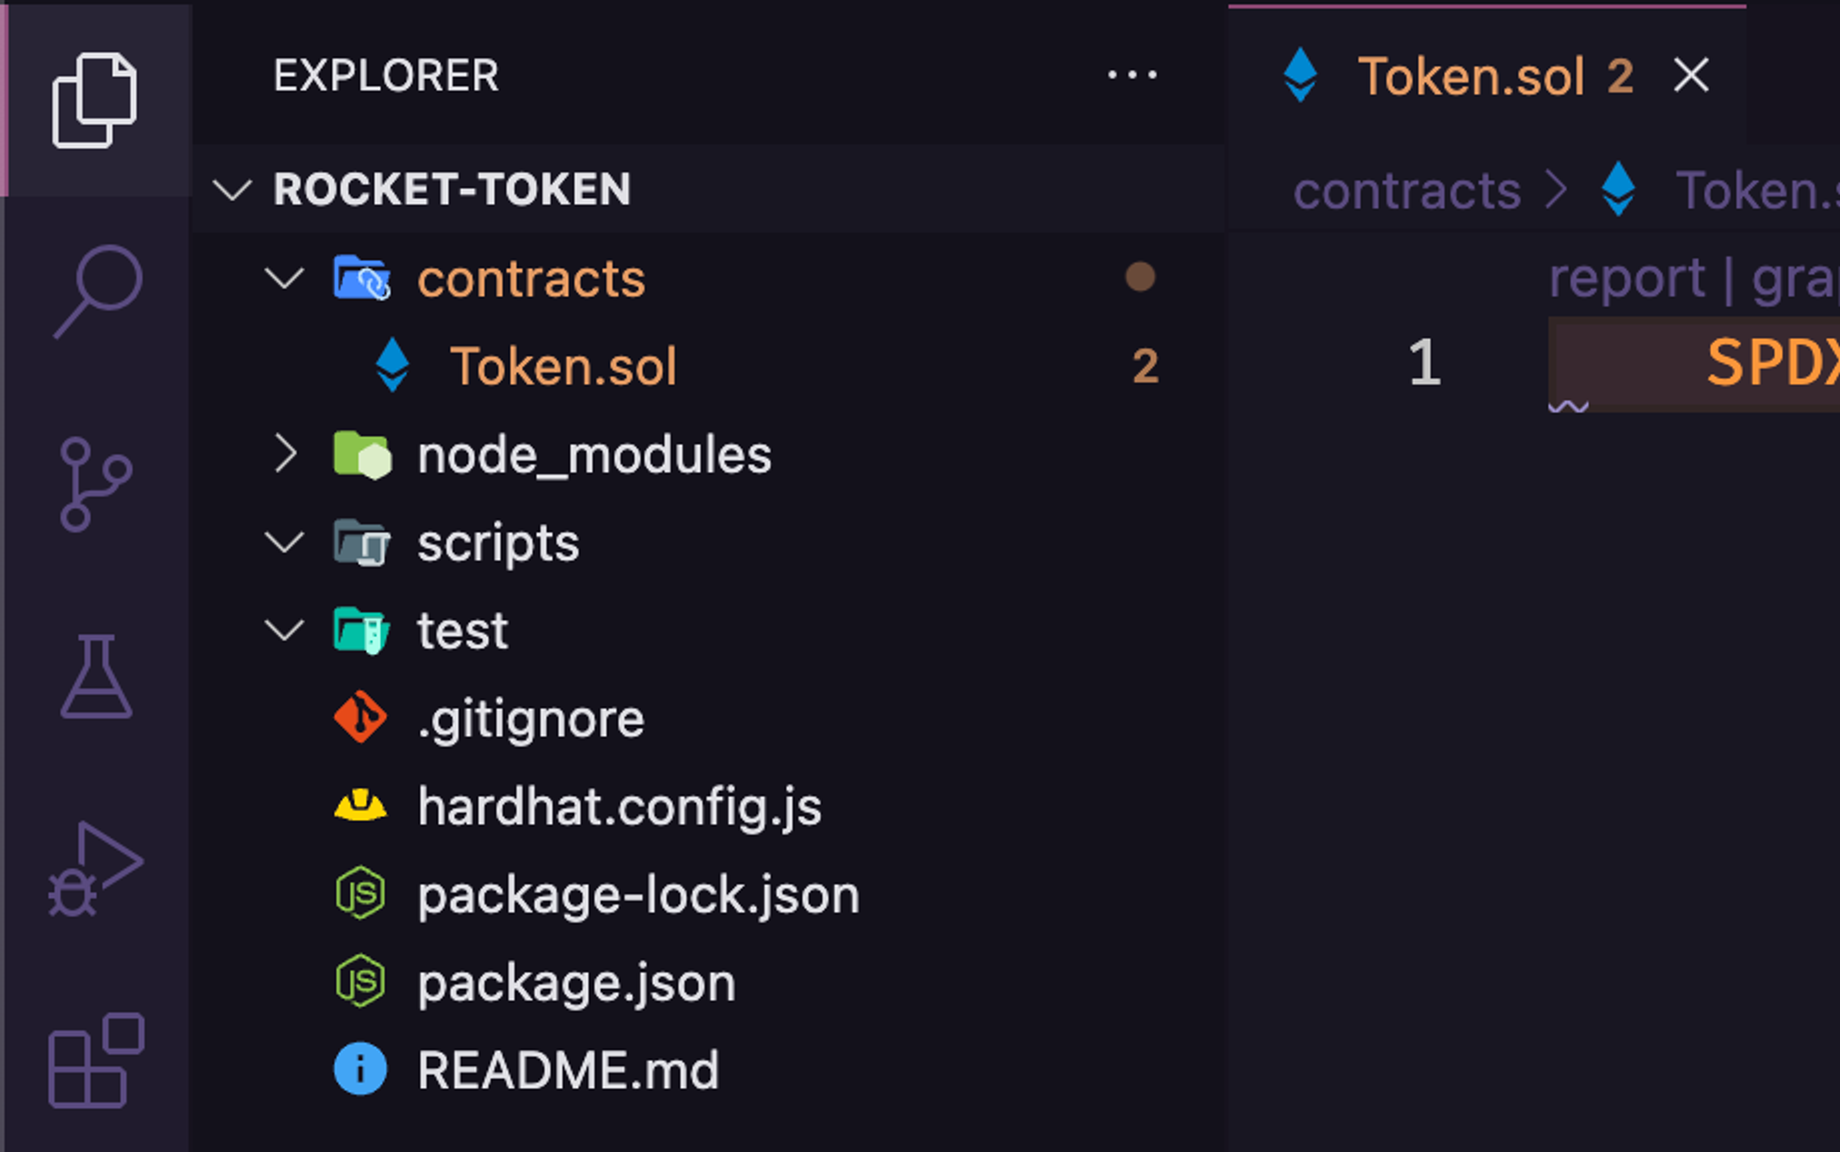
Now that we have our smart contract file created, we just have to fill it with useful code, right? So let’s start with the basics. This code will be the base to build our smart contract:
// SPDX-License-Identifier: MIT

pragma solidity 0.8.17;

contract Token {
  constructor() {

  }
}
After writing that piece of code, let’s import the dependencies from OpenZeppelin and use it on our smart contract. For that, we should add this line to the top of the file (ideally, between the pragma version and contract declaration):
import "@openzeppelin/contracts/token/ERC20/ERC20.sol";
All dependencies were loaded, and now we can use them in the code. Let’s make our Token contract extend the ERC20 contract. For that, we use the is keyword to tell Solidity that the contract is extending another. That’s how it should like:
...
contract Token is ERC20 {
...
If your code editor is already working fine with Hardhat, you are probably seeing the following compilation error:
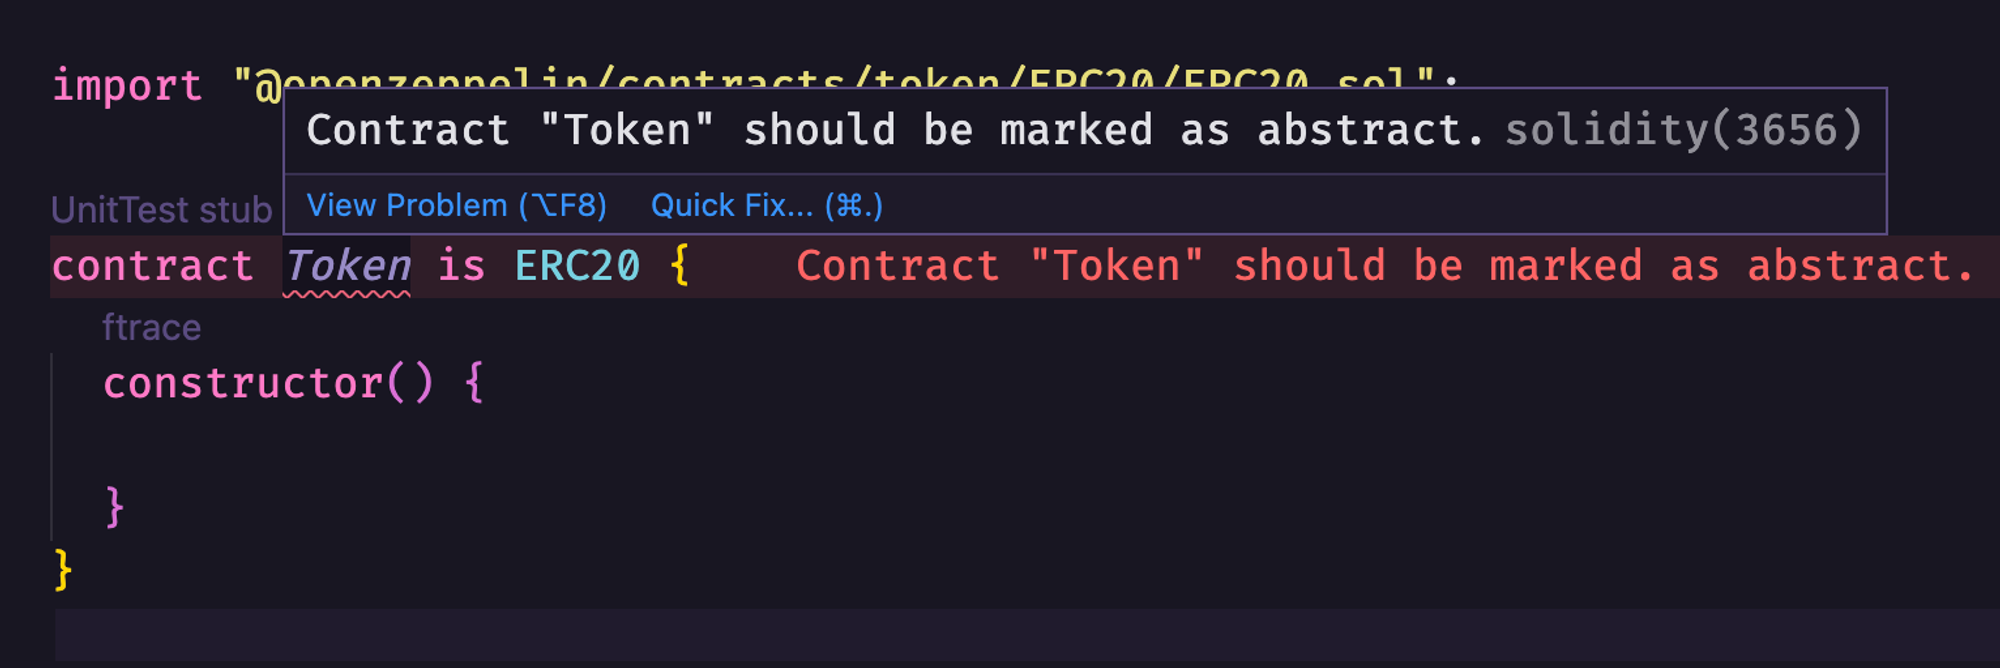
That’s because our contract should implement some features and initialize ERC20 inherited code. For that, we will use it on the constructor. Let’s add then the code to initialize the inherited contract code, and it will look like this:
// SPDX-License-Identifier: MIT

pragma solidity 0.8.17;

import "@openzeppelin/contracts/token/ERC20/ERC20.sol";

contract Token is ERC20 {
  constructor() ERC20("Rocket Token", "ROCKET") {

  }
}
The code is almost done, let’s just do one thing: mint some tokens at the time of deployment. We will call the _mint function from ERC20 to send one million tokens to the deployer:
// SPDX-License-Identifier: MIT

pragma solidity 0.8.17;

import "@openzeppelin/contracts/token/ERC20/ERC20.sol";

contract Token is ERC20 {
  constructor() ERC20("Rocket Token", "ROCKET") {
    _mint(msg.sender, 1_000_000 * 10 ** decimals());
  }
}
That’s pretty much a functional ERC-20 token. If you deploy it, it will work fine, deploying a new token on the network with 1M supply. Easier than you thought, right? But we will now cover how to extend and modify some features from the ERC-20 standard.
Step 5 - Modifying and Extending Default ERC-20 Behaviors
Nowadays it’s very common to see some tokens with additional features like taxes and rewards directly built into their contracts. We will see now how to add some simple features to our smart contract.
Modification #1 - allowing users to burn their tokens:
// SPDX-License-Identifier: MIT

pragma solidity 0.8.17;

import "@openzeppelin/contracts/token/ERC20/ERC20.sol";

contract Token is ERC20 {
  constructor() ERC20("Rocket Token", "ROCKET") {
    _mint(msg.sender, 1_000_000 * 10 ** decimals());
  }

  function burn(uint256 amount) external {
    _burn(msg.sender, amount);
  }
}
Modification #2 - allow users to mint new tokens by depositing some ether:
// SPDX-License-Identifier: MIT

pragma solidity 0.8.17;

import "@openzeppelin/contracts/token/ERC20/ERC20.sol";

contract Token is ERC20 {
  uint256 price = 0.01 ether; // price of 1 token in ether

  constructor() ERC20("Rocket Token", "ROCKET") {
    _mint(msg.sender, 1_000_000 * 10 ** decimals());
  }

  function burn(uint256 amount) external {
    _burn(msg.sender, amount);
  }

  function buy() external payable {
    require(msg.value > 0, "You must send some ether");
    _mint(msg.sender, msg.value * 10 ** decimals() / price);
  }
}
Step 6 - Compiling and Deploying
Before building and running our deploy script, install dotenv to manage secrets inside your project:
npm install dotenv --save-dev
To deploy our contract to the blockchain, we will create a deploy.js file inside the scripts folder:
const { ethers } = require('hardhat');

async function main() {
  const [deployer] = await ethers.getSigners();

  console.log('Deploying contracts with the account:', deployer.address);
  console.log('Account balance:', (await deployer.getBalance()).toString());

  const Token = await ethers.getContractFactory('Token');
  const token = await Token.deploy();

  console.log('Token address:', token.address);
}

main();
After creating our script, we will add our wallet private keys to make a real transaction on the blockchain. For that, edit the hardhat.config.js file as the following:
require('dotenv/config');
require('@nomicfoundation/hardhat-toolbox');

/** @type import('hardhat/config').HardhatUserConfig */
module.exports = {
  solidity: '0.8.17',
  networks: {
    goerli: {
      accounts: {
        mnemonic: process.env.MNEMONIC,
      },
      url: '<https://rpc.ankr.com/eth_goerli>',
    },
  },
};
In the case, we are using ETH Goerli Testnet. If you want to use a mainnet network, replace the goerli object with a valid network config.
Now you will need to input your wallet’s mnemonic to use it to authenticate and deploy the smart contract to the network. Create a .env file in the root of the project with the following content:
MNEMONIC=rifle enter coyote much acid smooth dolphin stairs south cattle immense paper
The mnemonic here is random and is connected to a wallet without funds. Replace the content with a wallet’s mnemonic with enough funds to cover the deployment expenses.
After all that, we should be able to run the deployment script with this command:
npx hardhat run scripts/deploy.js --network goerli
In this context, the name “goerli” refers to the name of the network inside the networks object defined in hardhat.config.js.
And that’s the expected output:

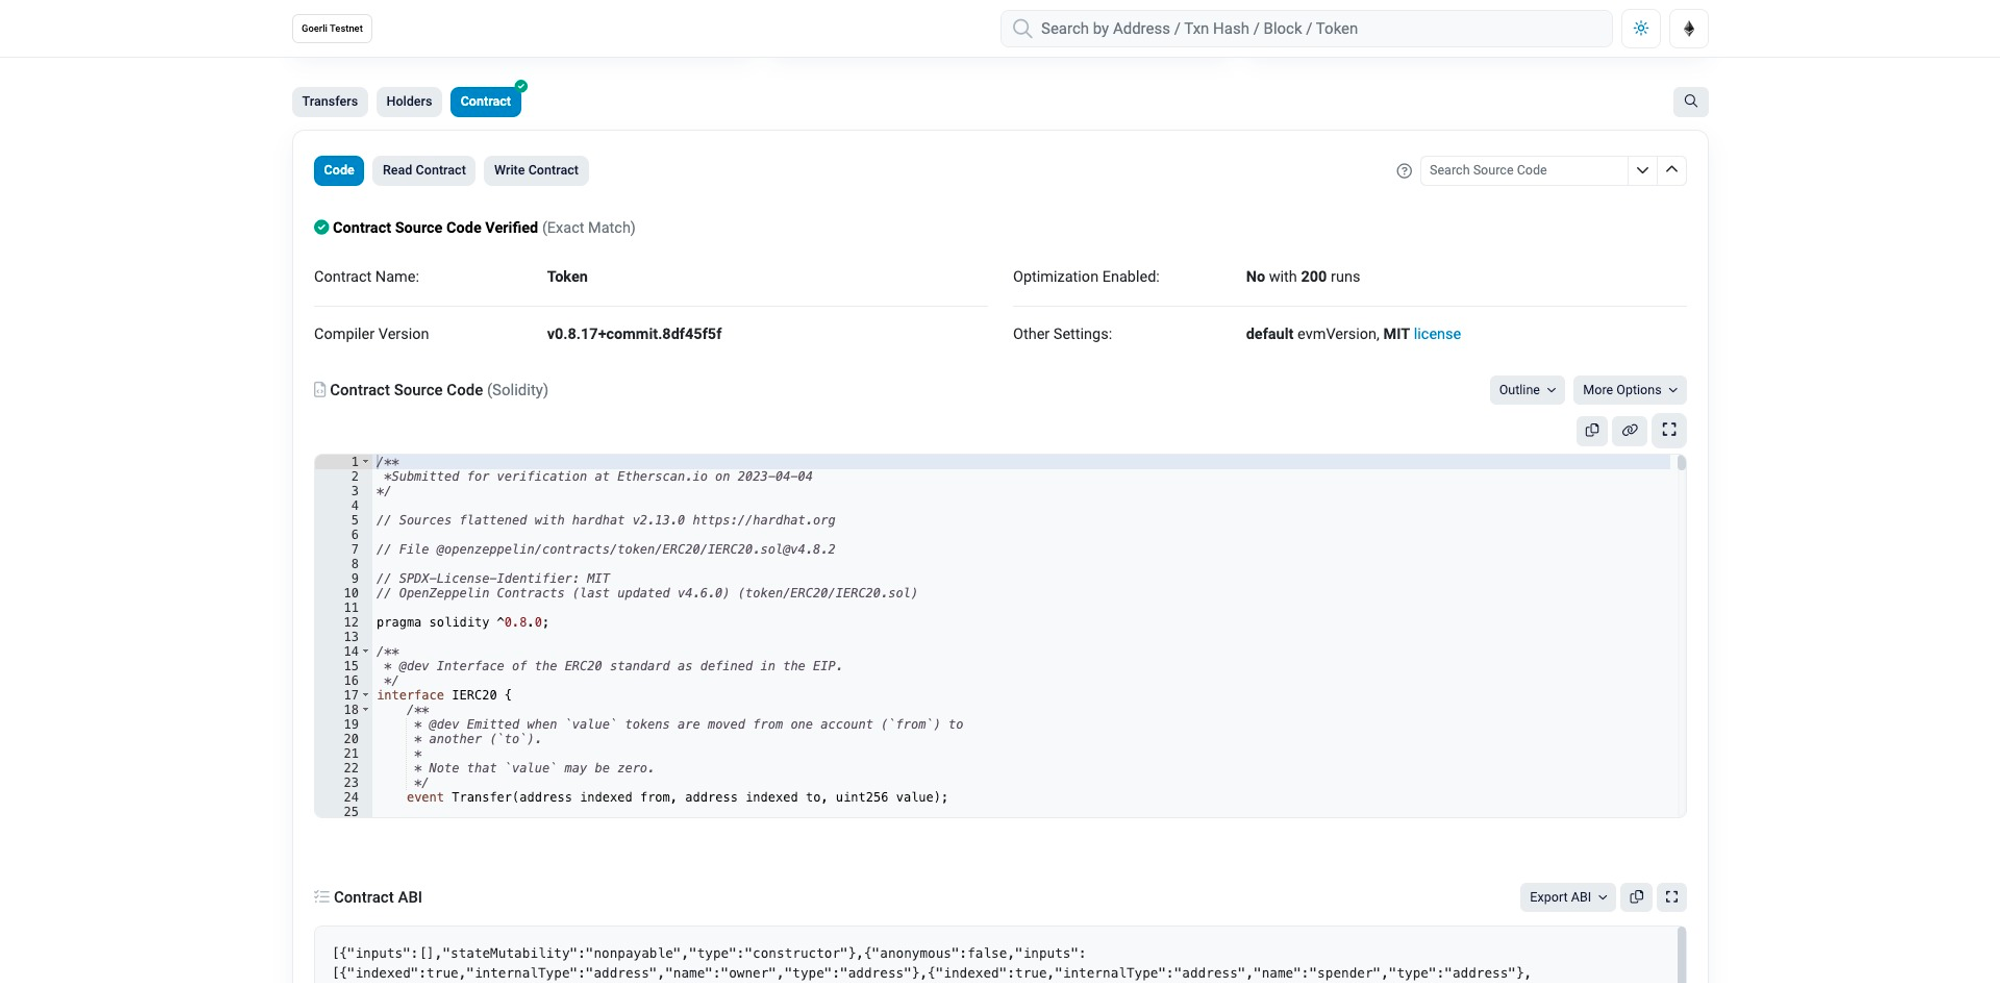
We can now find the contract in the blockchain explorer:

https://goerli.etherscan.io/token/0x454337827f119cdd56e2962ef40a4ccc1a44bc63#code
We will verify the source code of the contract. The simplest way of doing that is flattening the contract code (joining all smart contracts into just one file) and uploading it to Etherscan. Let’s do it:
npx hardhat flatten > output.sol
The flattened code will be written in the “output.sol” file.
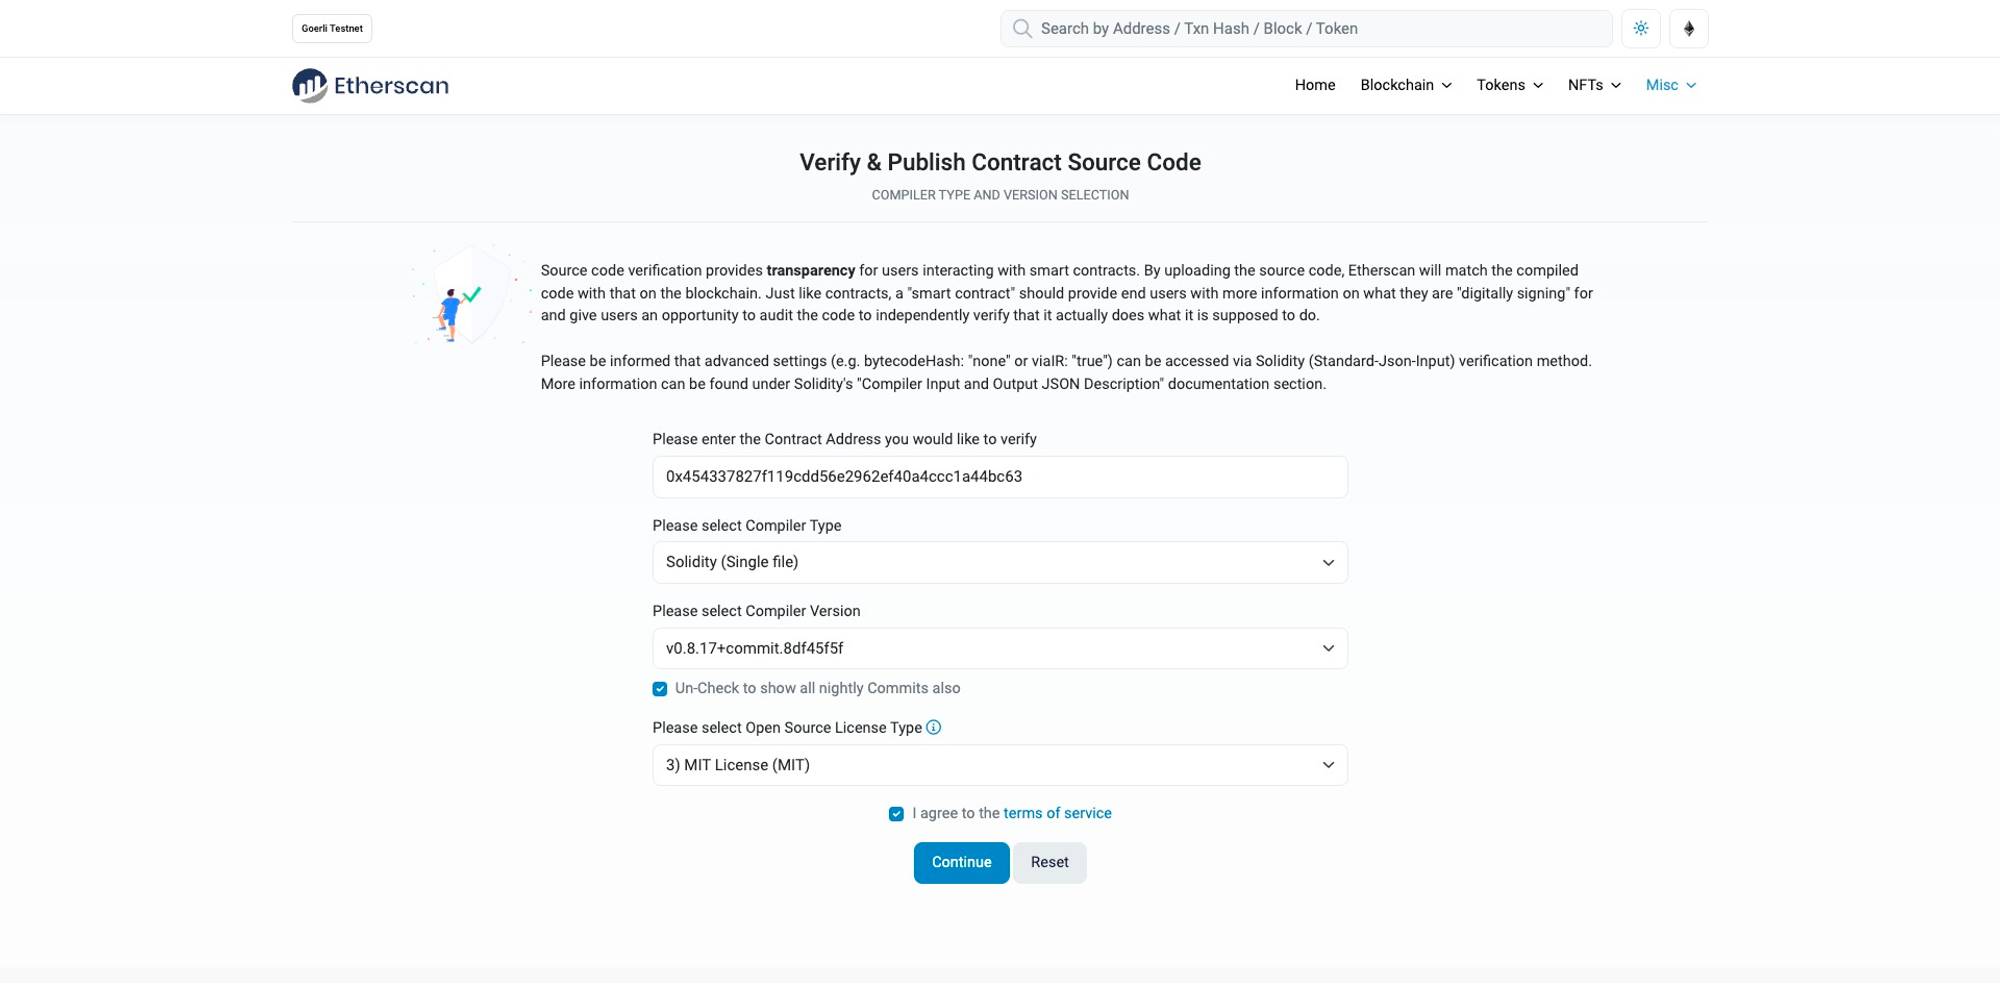
After clicking Verify and Publish, we select these values above
Before submitting our code, the flattened file probably has one issue: it has more than one SPDX license identifier. To solve that, we will remove all SPDX lines from the file except the first one.
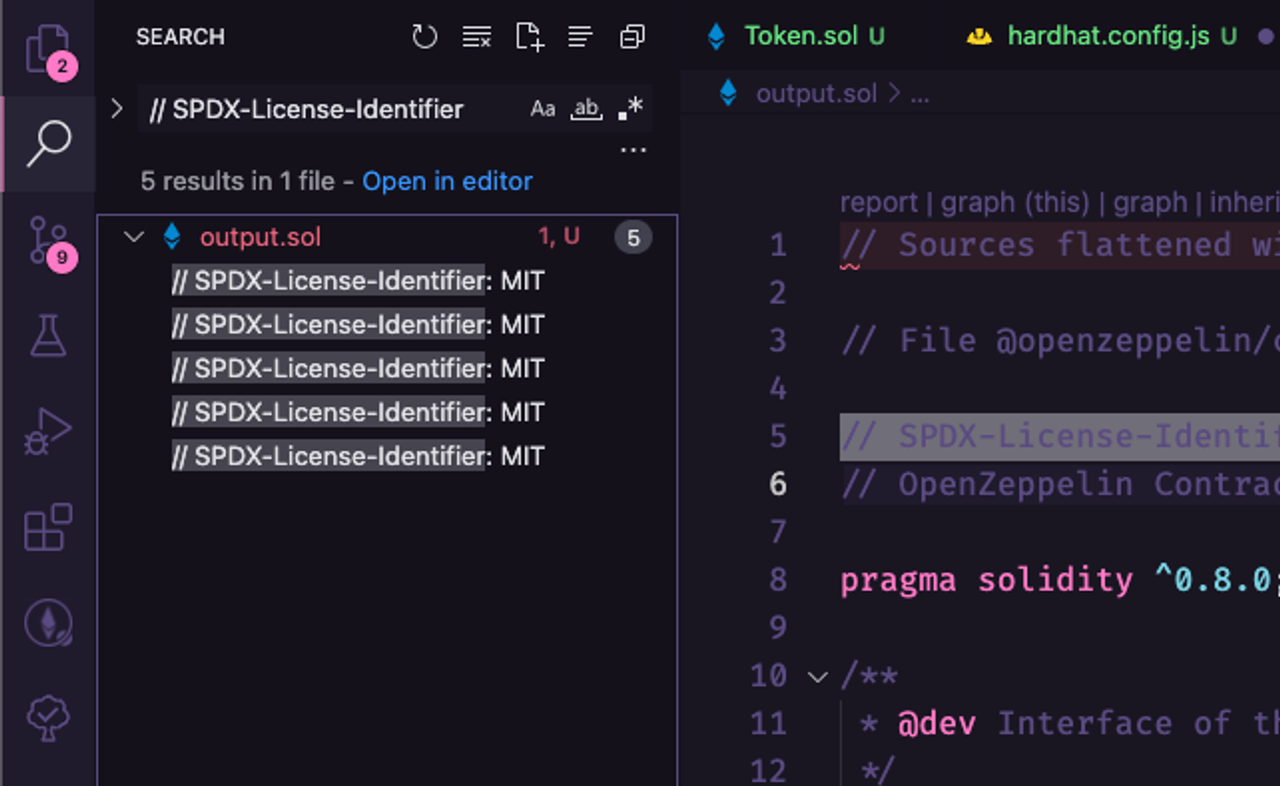
We’ll let just the first of the five occurrences, removing others.
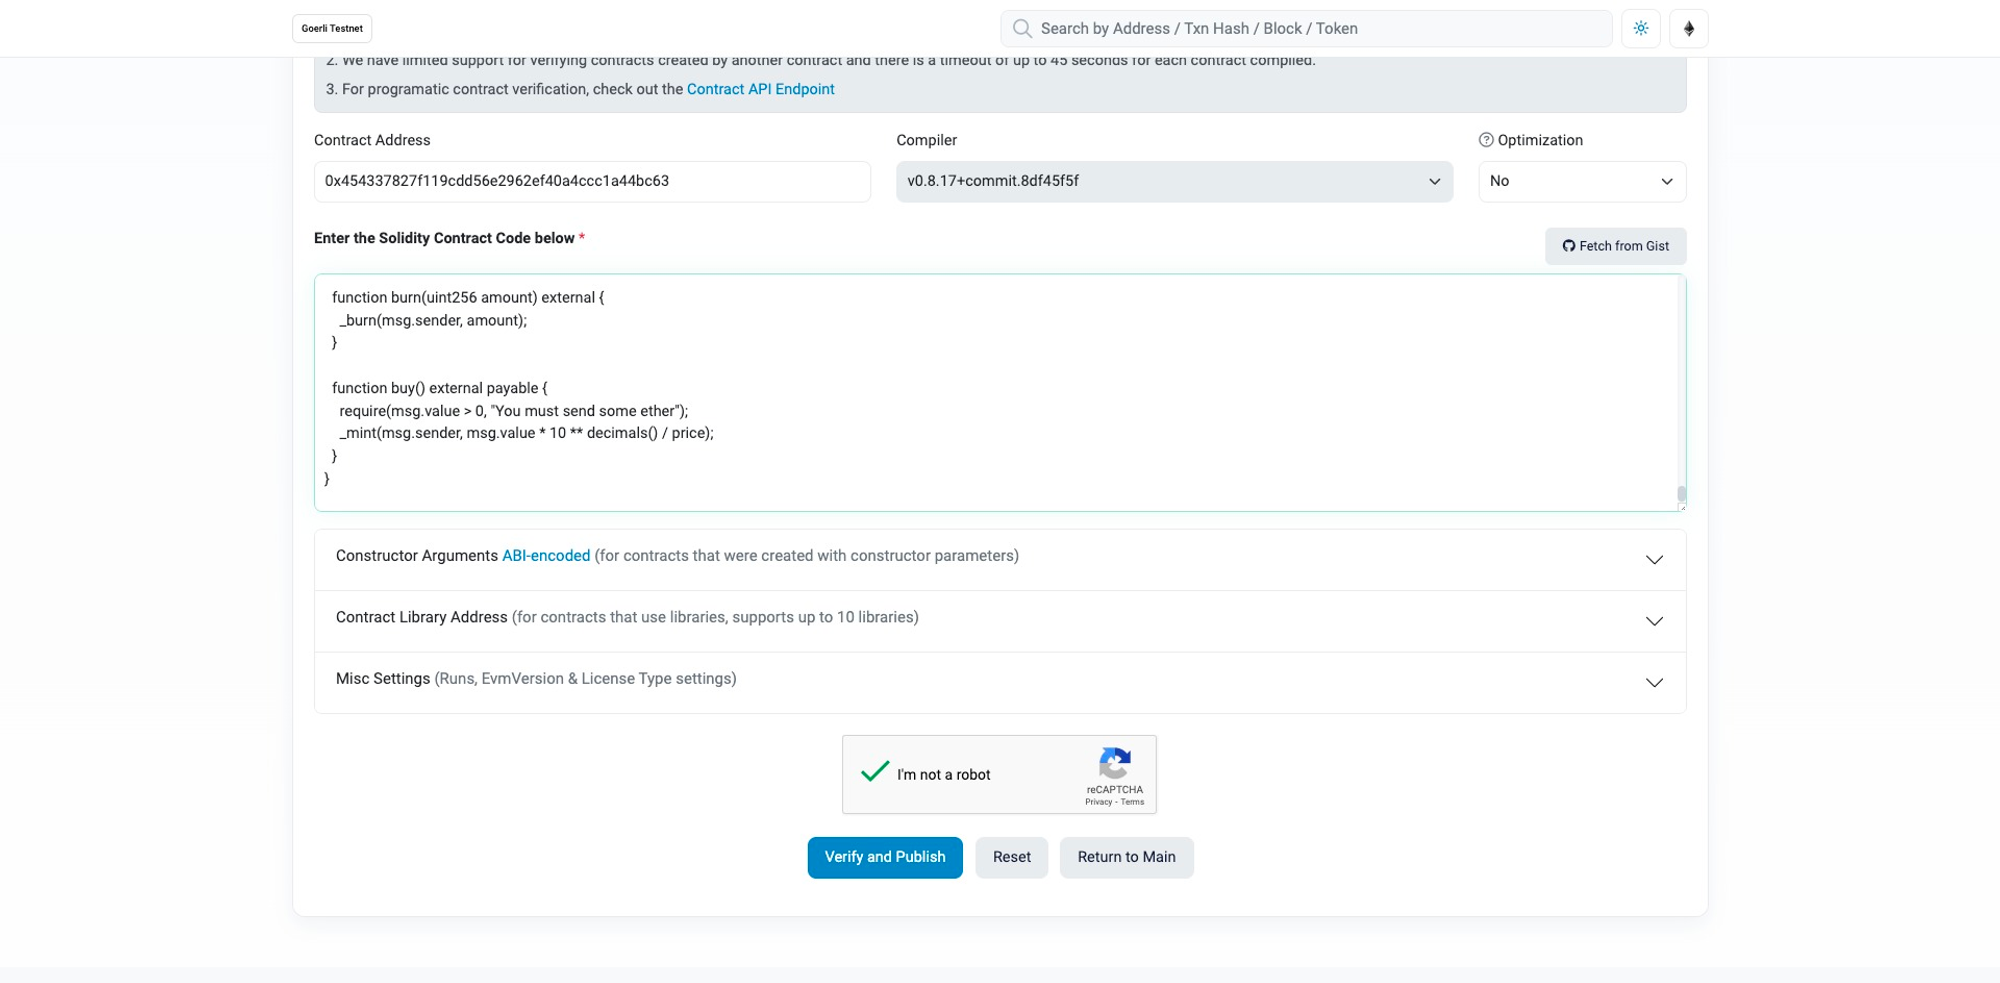
After solving the issue, we’ll copy-paste it into the Etherscan verification step:
If everything is correct, you will see this message:

Now the contract code is verified, and it’s publicly visible to all users.
Compliance Concerns
It’s very important to follow all ERC-20 standards. The specified behaviors from ERC-20 are trusted by all sources that implement ERC-20 tokens as part of the software. For example, yours should – and should only – emit Transfer events when transfers are performed between users. These events are trusted as proof of funds being moved between accounts and, if not properly executed, can be an issue for exchanges and wallets tracking transactions and balances.
Some other behaviors are expected to happen when dealing with ERC-20 tokens. Such as:
- Transfers should return a bool value representing the transaction success;
- Transfers of zero tokens should be treated as normal transfers and emit the
Transferevent; - Minting and burnings are treated as transfers, so they should emit a
Transferevent. When minting new tokens,_fromis 0x0. When burning,_tois 0x0.
Always refer to the original documentation to avoid building contracts that break the ERC-20 standard.
Final Words
As covered in this article, creating an ERC-20 token smart contract can be simple, but still, it’s very tricky, and rules should be followed to avoid issues. One good way to check your contract compliance is by writing automated tests. Hardhat has a good testing suite of tools, and you can test everything that could happen with your smart contracts. Don’t hesitate to create lots of tests to ensure every single possible case.
For a developer, documentation is always your best friend. Always consult the official language documentation and the framework specification. Have fun and send your new token to some friends!
Resources
GitHub repository with all code from this article: https://github.com/hknio/rocket-token